


High-Precision Manual T-Type Tile Cutter 90cm Professional-Grade Aluminum Alloy Scoring Tool
This 90cm Manual T-Type Tile Cutter is a professional scoring tool designed for tilers, glaziers, and DIY enthusiasts. Constructed from aircraft-grade aluminum alloy and equipped with a 22mm carbide cutting wheel, it effortlessly achieves precise cuts on tiles, glass, and marble. Lightweight yet durable, it serves as an indispensable precision assistant on your job site.
Product Description
Key Product Highlights
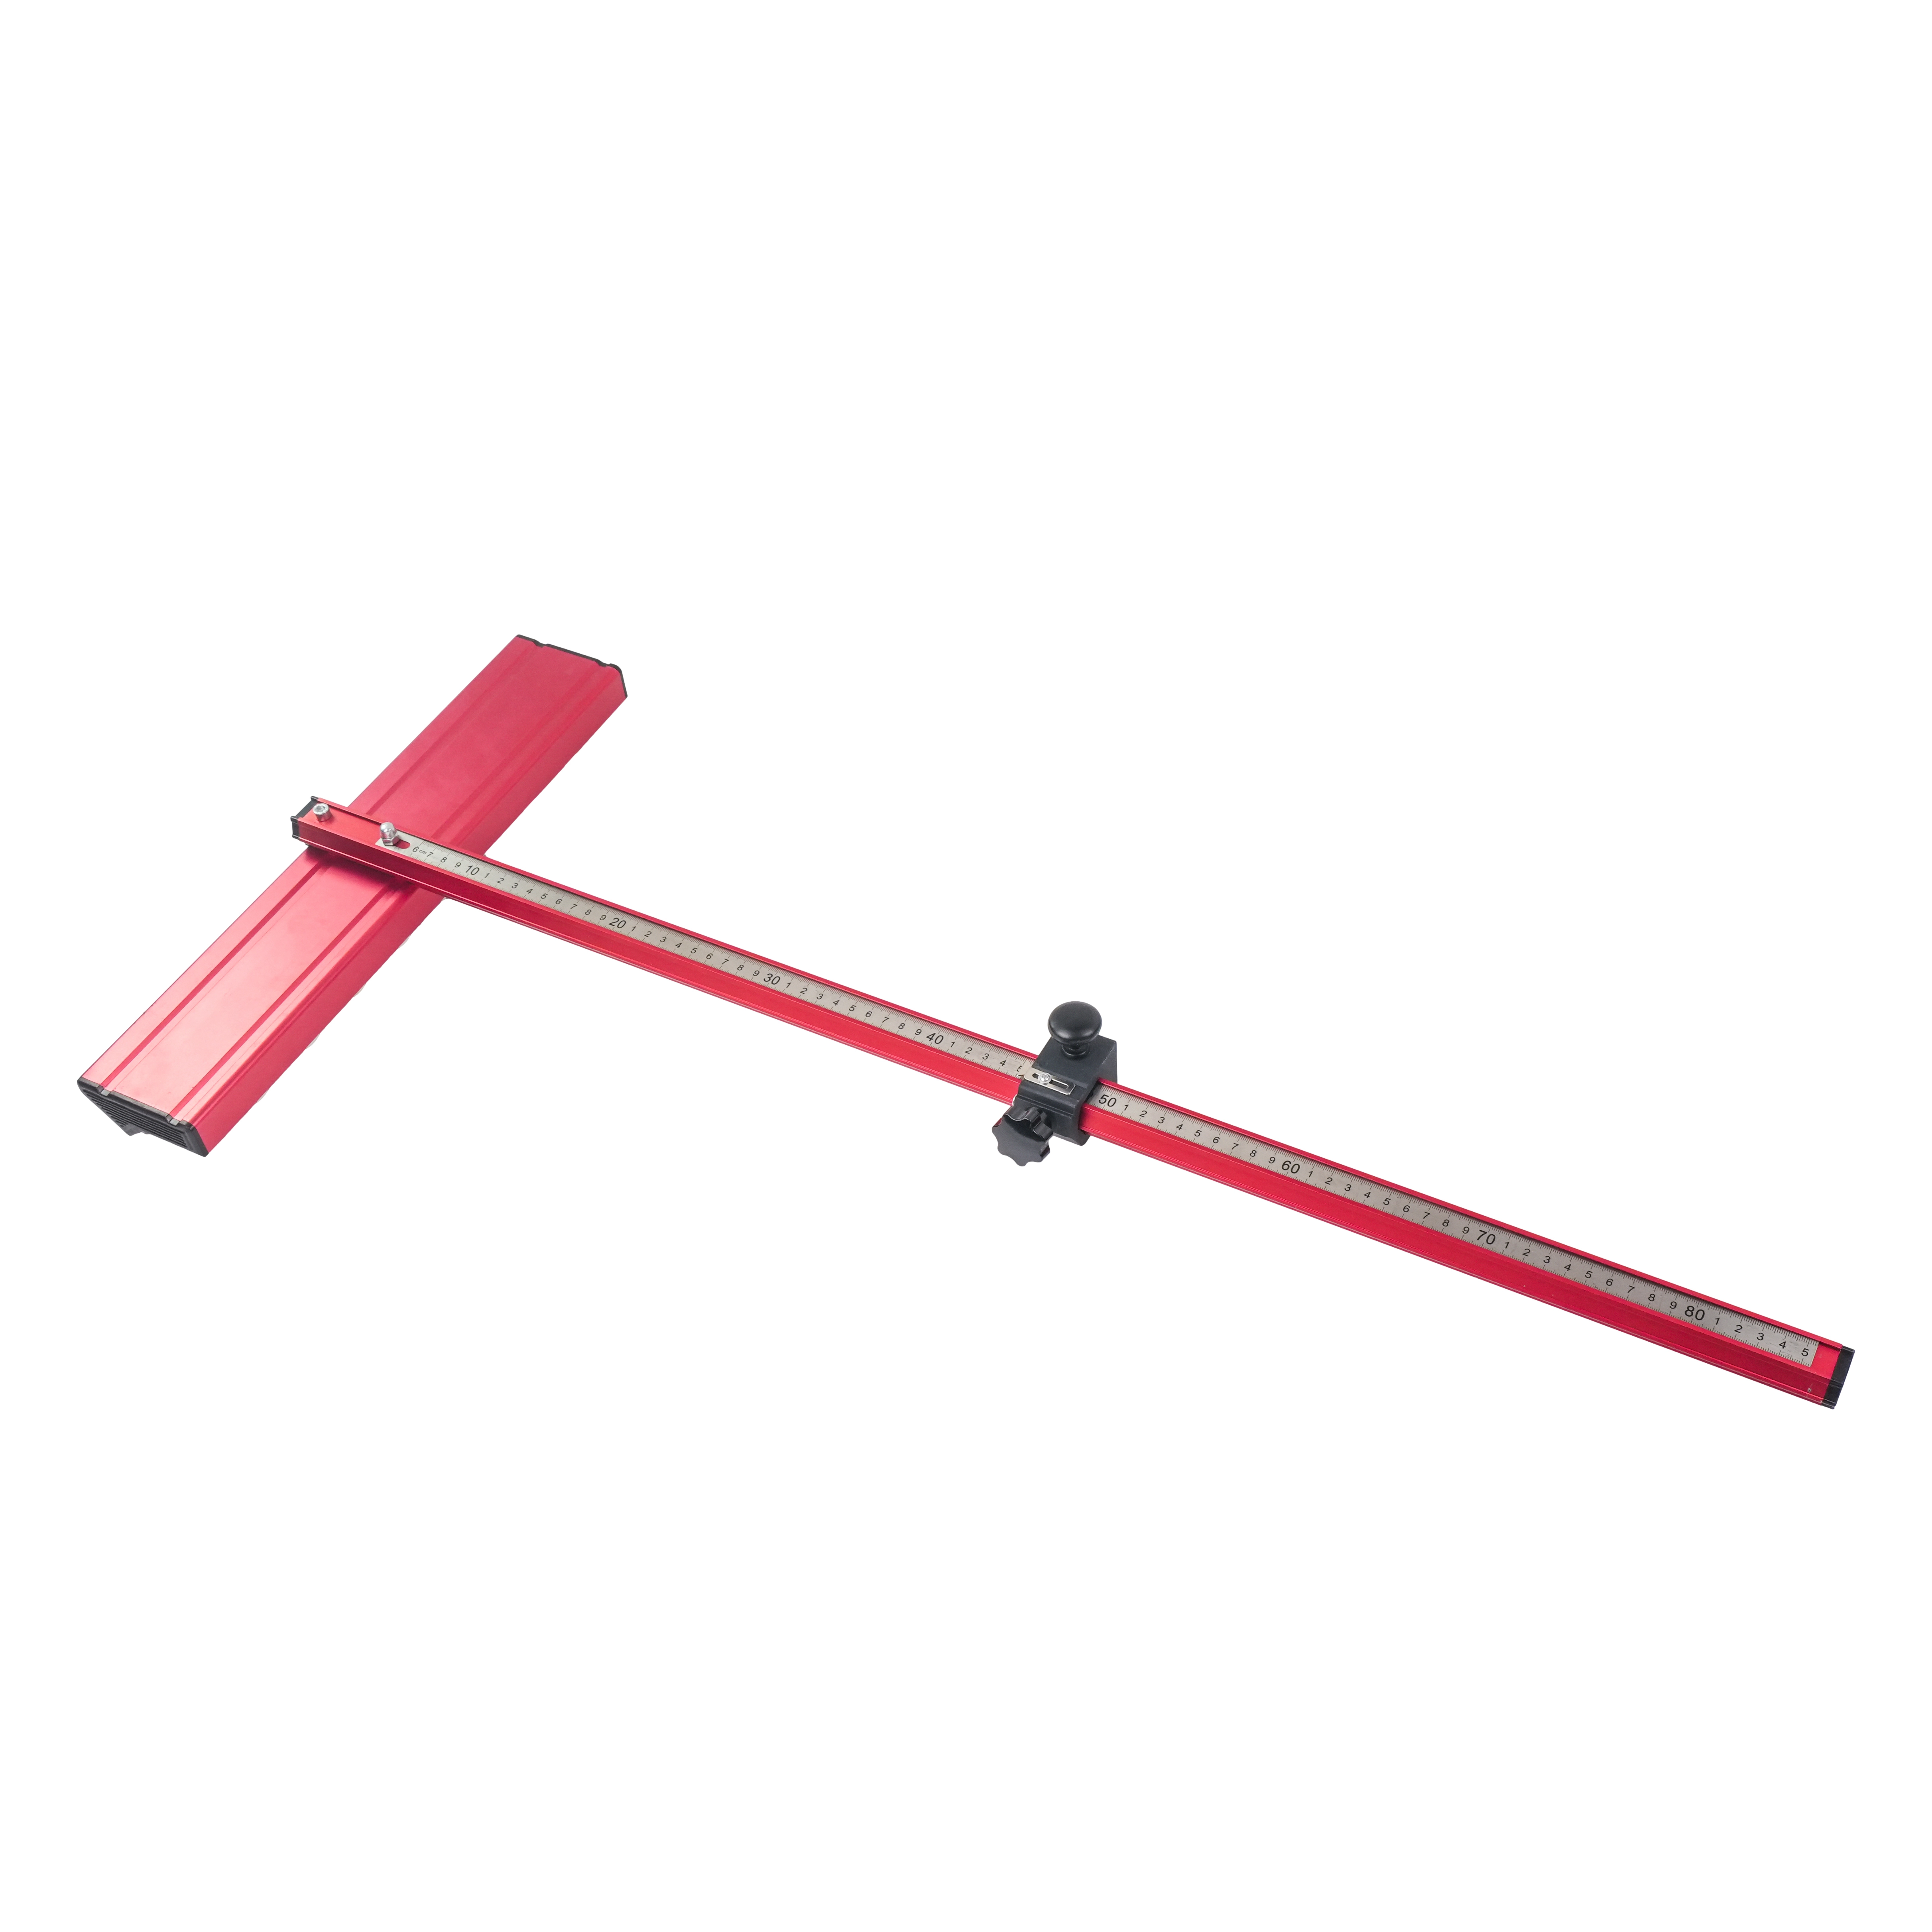
Robust yet Lightweight Design (Structure & Materials): The main body is crafted from thickened aluminum alloy, significantly reducing overall weight while ensuring exceptional structural integrity. Its classic T-shaped structure allows it to glide snugly along the edge of tiles, guaranteeing precise, deviation-free cuts over long distances.
Industrial-Grade Precision Specifications:
Maximum Cutting Width: 900mm (90cm)
Applicable Cutting Thickness: 3mm – 12mm
Precision Cutting System (Core Components): Features a built-in 22mm tungsten-titanium alloy bearing cutter wheel, delivering sharp scoring performance and exceptional longevity. The surface of the push rod features laser-etched measurement scales—impervious to wear—ensuring that every positioning adjustment is accurate to the millimeter.
Broad Material Compatibility (Applications): Not only is it ideal for standard tiles, polished tiles, and vitrified tiles, but it also performs flawlessly when cutting flat glass, mirrors, and lightweight stone materials.
product Advantages
Expert Usage Guide
Step 1: Precise Marking
Using a pencil or marker, mark the intended cutting line directly onto the glazed (smooth) surface of the tile.
Step 2: Alignment and Scoring
Precisely align the cutting wheel of the T-cutter with the marked starting point. While holding the handle with one hand, apply steady, moderate pressure and push the tool forward.
Pro Tip: Score the tile only *once*! Repeated scoring can lead to chipping along the cut edge or damage to the cutting wheel. A crisp "hissing" sound indicates that the scoring was successful.
Step 3: Snapping
Once the scoring is complete, use the cutter's built-in pressure foot—or place a thin steel wire or rod underneath the scored line—and apply even downward pressure on both sides of the line. The tile will snap cleanly along the scored path.
Step 4: Edge Finishing
For the cut edge, it is recommended to perform a light sanding using a diamond rubbing block or grinding wheel to ensure the edge is smooth and rounded.
Professional Tile Laying Tool Manufacturer and Trader | Factory Direct Supply & Global Delivery